
How to Disable Cortana in Windows 11 (2022 Guide)
Finally, Windows 11 will be launched, and we now have a release date for it: October 5, 2021, which is just around the corner. The good news is that the update is completely free for everyone who has a Windows 10 computer. Due to the TPM 2.0 problem, the update process itself was extremely difficult. Everything, including the taskbar, game mode, and the Cortana virtual assistant, will appear a little more polished with this latest operating system upgrade.
However, today’s blog will be mostly focused on Cortana. Although this is not enabled by default, and you must first log in to do so, it is possible to enable it.
However, many users become irritated while attempting to disable this function since they are unable to locate the appropriate setting to do so. That is why we have created a new tutorial to aid you in removing or enabling Cortana assistance in Microsoft Windows 11. So, let’s have a look at the steps.
Table of contents
How to Disable Cortana on Windows 11 (with screenshots)
As previously stated in this article, Cortana is not activated by default in Windows 11; you must explicitly enable it in order for it to work.
However, imagine you’ve already selected this option and now want to disable or delete it, but you can’t seem to discover a means to accomplish this. Then, follow the instructions listed below:
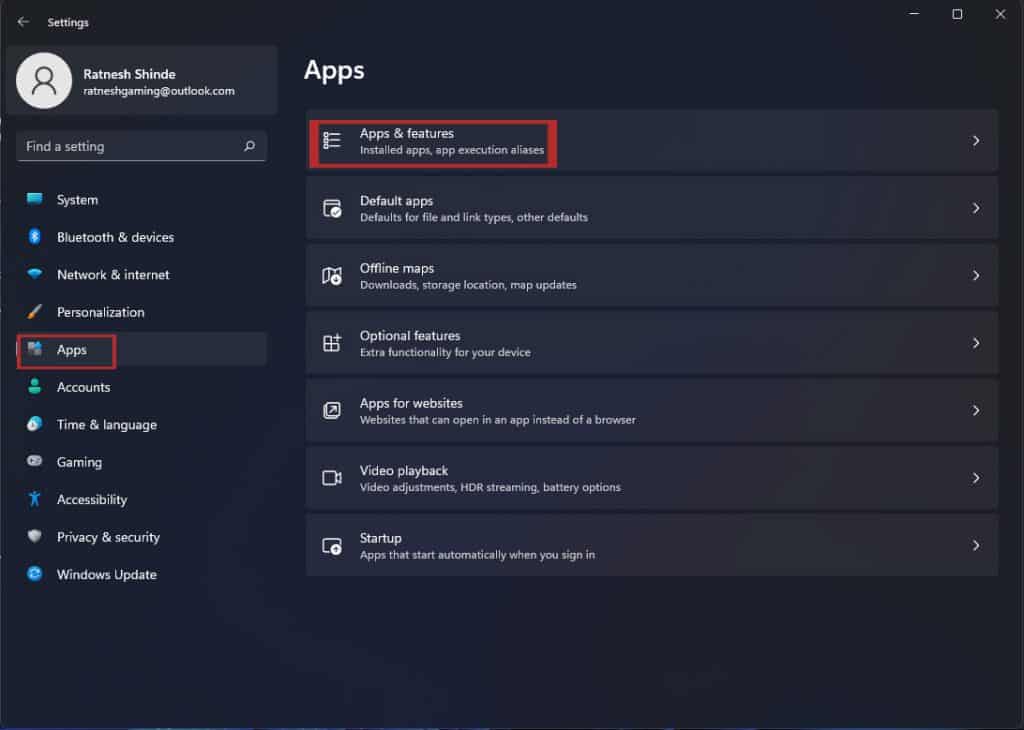
- First and foremost, press the Win + I keys together to bring up the Windows settings menu. Alternatively, you may use the Windows search bar to look for it in the system.

- After that, navigate to the Apps tab and select Apps & Features from the dropdown menu.
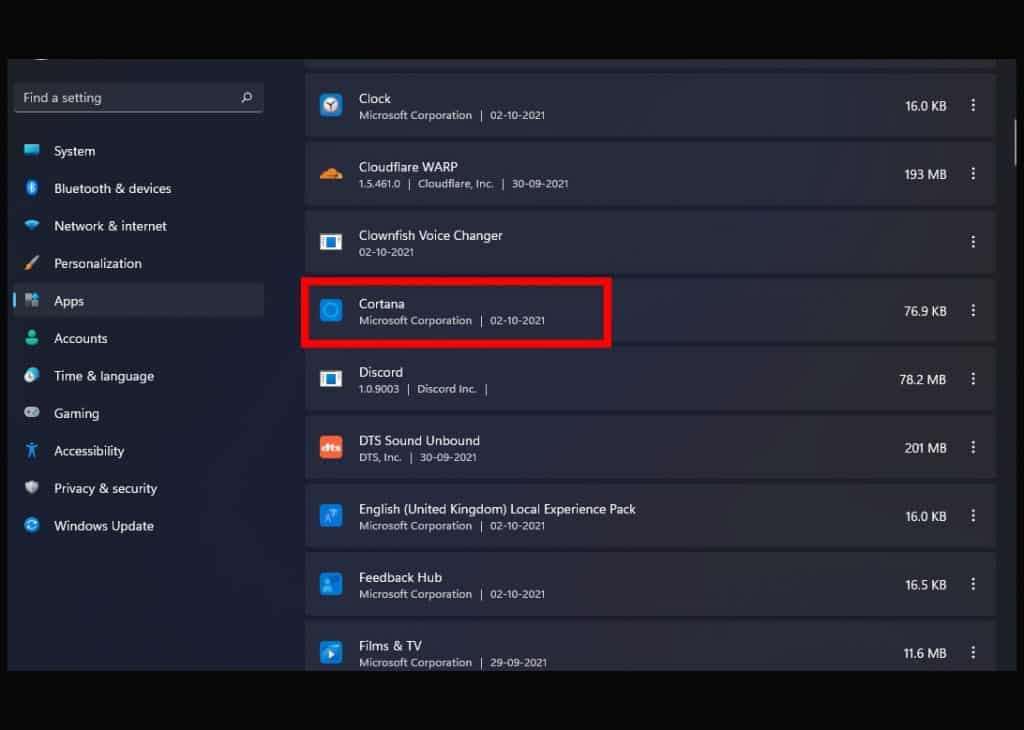
- A list of the programs that have been installed will now be shown. Locate the Cortana program in the list and choose it by clicking on the button next to it.
- Afterward, from the menu, pick the Advanced option to continue.
- That’s all there is to it. Then turn off the microphone and Cortana by toggling the buttons situated in front of them to the Off position.

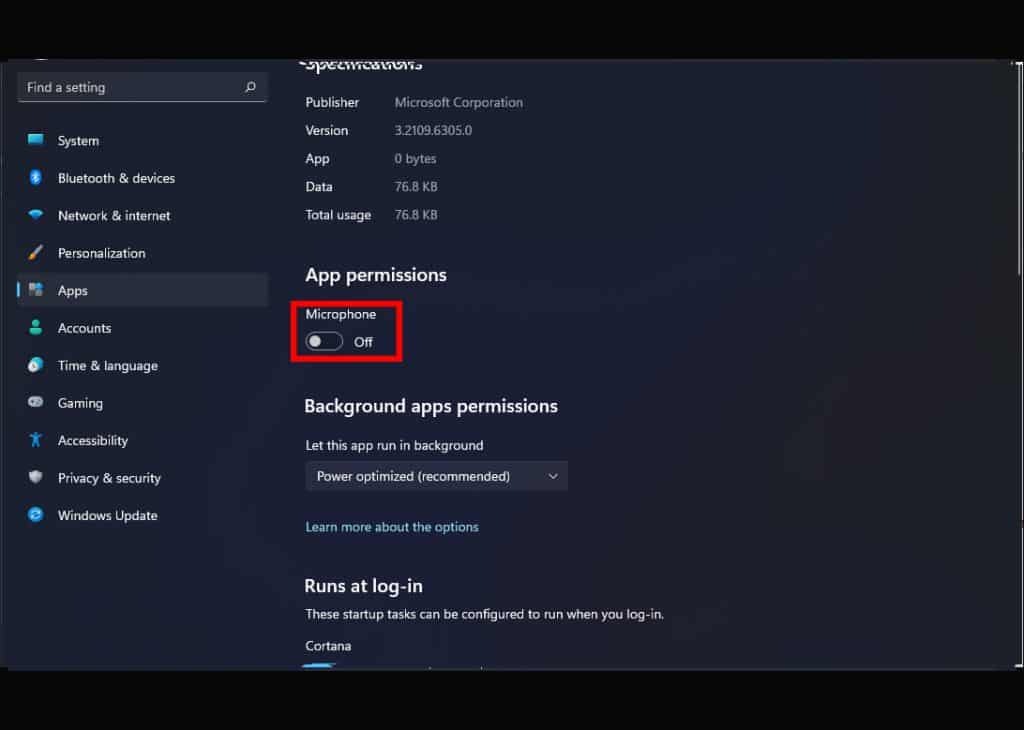
That is how you may turn off the virtual help provided by Cortana. Afterward, if your mood shifts and you wish to utilize Cortana once again, just repeat the process described above, this time switching the buttons to the On position.
In the event that the solution outlined above does not work for you, there are some more options accessible. However, you may choose to use one of the following ways.
1) Through the use of the Registry Editor
This technique will permanently disable Cortana unless and until you re-enable it via the Registry method.
As a result, prior knowledge of how to change the Windows Registry is required in order to complete this approach. However, if you are unsure, you should follow the procedures outlined further down in this article to learn.
- To begin, hit the Win+R keys simultaneously to bring up the Run dialogue box, where you should input regedit. After that, press the enter key.

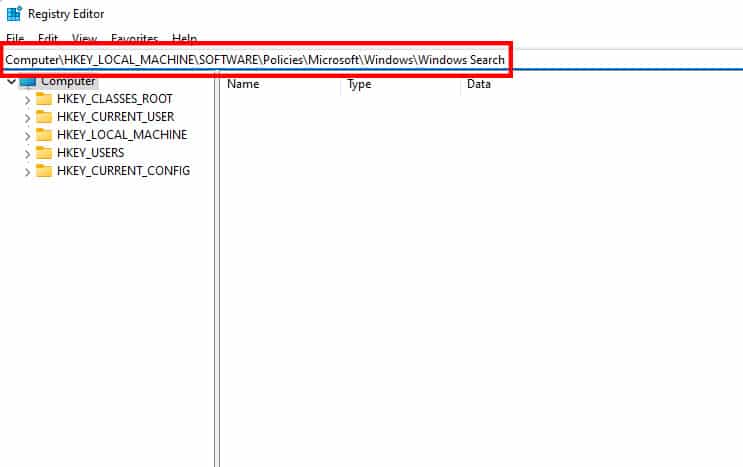
- After that, copy and paste the following address into the address bar:
‘ComputerHKEY_LOCAL_MACHINESOFTWAREPoliciesMicrosoftWindowsWindows Search’

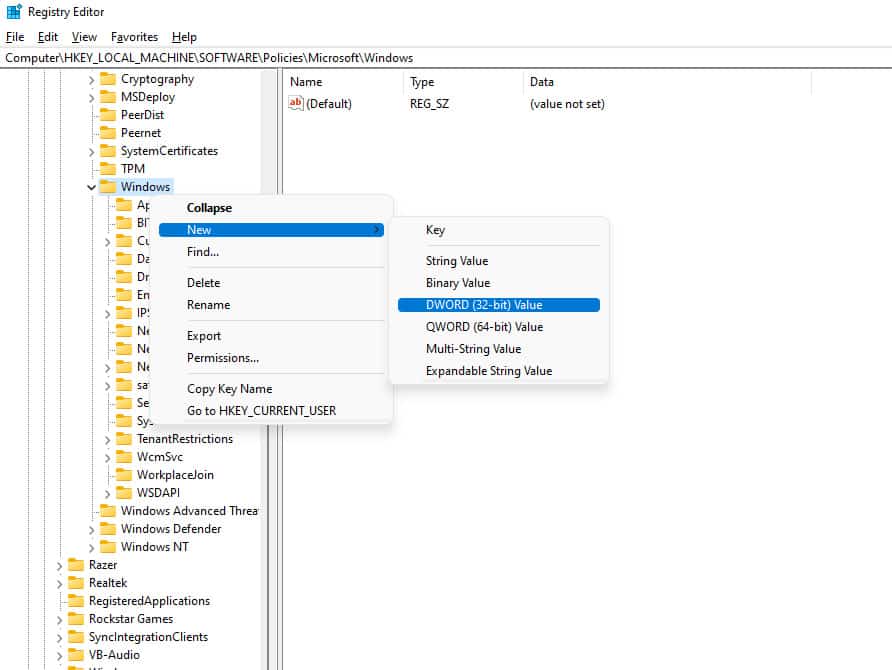
- After that, you must right-click on the Windows folder to open the dropdown menu. Now, from the drop-down menu, pick New followed by DWORD (32-bit) Value from the list that appears.

- Give it a name like “AllowCortana” and double-click on it once again to activate it.

- Finally, in the Value Data field, enter the value 0 and press the enter key.


2) Using Windows PowerShell, uninstall Cortana from your computer
Cortana may be removed from your Windows 11 computer via still another technique, as described above.
However, yes! You should keep in mind that this will permanently delete the Cortana file from your computer, and you will not be able to use it again unless you reinstall it.
- To begin, go to the Start menu and type “Windows PowerShell” into the search box. Then, with administrative privileges, launch the Command Prompt.
- You may now use the following command if you desire to remove Cortana for the currently logged-in Windows 11 user:
‘Get-AppxPackage *Microsoft.549981C3F5F10* | Remove-AppxPackage’

- If, on the other hand, you desire to uninstall it for all existing Windows 11 users, the following command will assist you:
‘Get-AppxPackage -allusers Microsoft.549981C3F5F10 | Remove-AppxPackage
‘

Conclusion:
This concludes our tutorial on how to turn off voice help on your Windows 11 computer, so thank you for your time. However, if you found this article to be helpful, please share your thoughts with us in the comment area below. Thank you!