
How to Play Apex Legends on Mac? (100% Working)

When it comes to graphics performance, most Mac products fall behind their competitors. Given that most laptops and PCs in the same price range as Macs come with external graphics cards, the integrated GPUs are barely adequate to play Apex Legends on a Mac — assuming the game can run on macOS, that is.
However, it is not an overall performance that distinguishes Macs from the competition. They are great workstations that last over a decade, which is unusual these days. It will be a great advantage if you can play your favourite game on it, but don’t anticipate console or PC-level frame rates from your beloved Macbook.
Table of contents
Play Apex Legends on Mac
Apex isn’t accessible for download through Origin’s Mac client since the game doesn’t support macOS, and it doesn’t appear like it will become natively available on the platform any time soon. However, Mac users aren’t without alternatives, and there are a few methods to try your hand at becoming an Apex champion while playing on a Mac.
If you’re not afraid to make any changes to your Mac, you may unlock its full potential by connecting an external GPU and setting it on a good cooling pad. The two together will provide your Mac gaming laptop-like performance, which should help you attain smooth frame rates while playing Apex on it.
1. Play through the cloud

Cloud gaming has made great strides in providing the greatest gaming experience to players that lack the requisite hardware to play games. While you may expect smooth and playable frame rates, the quality of your gaming experience will be significantly influenced by the reliability of your internet connection.
For example, GeForce NOW requires at least 15 megabits per second for 720p at 60 frames per second and 25 megabits per second for 1080p at 60 frames per second. Although these numbers may be achieved with Wi-Fi, we recommend utilising an ethernet wire to eliminate any potential problems.
Getting a GeForce Now account, on the other hand, might be challenging because NVIDIA only accepts customers with a restricted capacity throughout the year. The free edition of the service only allows you to play for an hour, which is insufficient for a fulfilling Apex session.
But it doesn’t mean you’re out of luck. In the cloud gaming sector, there are additional companies like Parsec and Vortex. It’s also worth keeping a watch on more prominent cloud gaming services such as Google Stadia and Amazon Luna.
Apex’s prospects of being released on other popular cloud platforms are slim, given that EA is developing its own cloud gaming service. There are no specific dates for when this service will be accessible, but the developer might do a surprise beta test, similar to how it did for the game’s release in 2019.
Despite the fact that some streaming platforms provide a free trial period, you’ll need to become a paying member to keep utilising their services. After you’ve downloaded these services, all you have to do is run Apex from the list of compatible titles and log in with your EA account information.
2. By Installing Windows on your Mac with the Boot Camp
Installing Windows on your Mac may seem like it defeats the purpose of owning one, but it’s the only way to play Apex on a Mac natively if you don’t want to use streaming services. When you install Windows on your Mac, it will function similarly to a Windows laptop.
If you’re not planning on purchasing an external GPU to boost your gaming performance, you’ll need a graphics card that’s at least as powerful as the NVIDIA GeForce GT 650 built inside your Mac. You’ll only be able to go to Apex’s main menu if your GPU isn’t powerful enough.
- You’ll use an integrated utility application called “Boot Camp” to install Windows on your Mac. Before you do anything else, go to Microsoft’s official homepage and get the official ISO file for Windows 10.
- Users are guided through the download procedure by Microsoft, and the ISO file should begin downloading after a few clicks. In the meanwhile, get a USB stick with at least 5GB of storage space, as you’ll be using it as a boot drive.
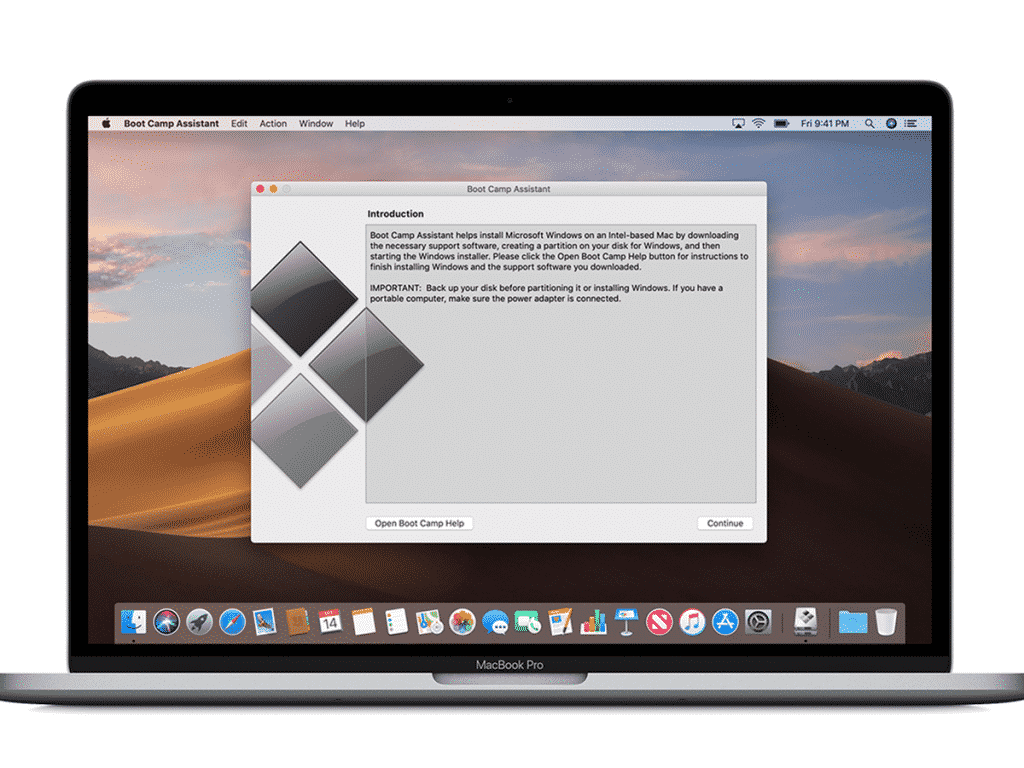
- You’ll need to run the “Boot Camp Assistant” after you’ve successfully downloaded the ISO file. You may accomplish this by hitting cmd and the space button at the same time and typing in the name of the file.
- The Boot Camp Assistant will present you with a tiny popup asking whether you want to install the newest Windows support software for Apple, which you should do. You’ll also need to click on Install Windows, which will bring up a second pop-up asking you to find the ISO file you got from Microsoft.
- Make sure you choose the right thumb drive since your Mac will use it as a boot disc to begin the Windows 10 installation process. Newer Mac models may not even require a replacement USB stick, since the procedure can be completed entirely on your Mac’s hard disc.
- You’ll also need to determine how much space Windows should take up on your computer. We propose designating at least 80GB for Windows to take over, given that EA requires a free storage capacity of at least 22GB for Apex to install.
- After the Boot Camp Assistant has finished its work, the Windows setup programme should take over and walk you through the rest of the installation.
- After the installation, Windows 10 should start up on its own, with the familiar home screen welcoming you back to a new experience.
- You’ll need to install Apex in the same way you would on a regular PC. To begin installing Apex, download Origin for Windows and connect in using your login credentials.
3. Play Apex Legends on Mac via Sony Remote Play
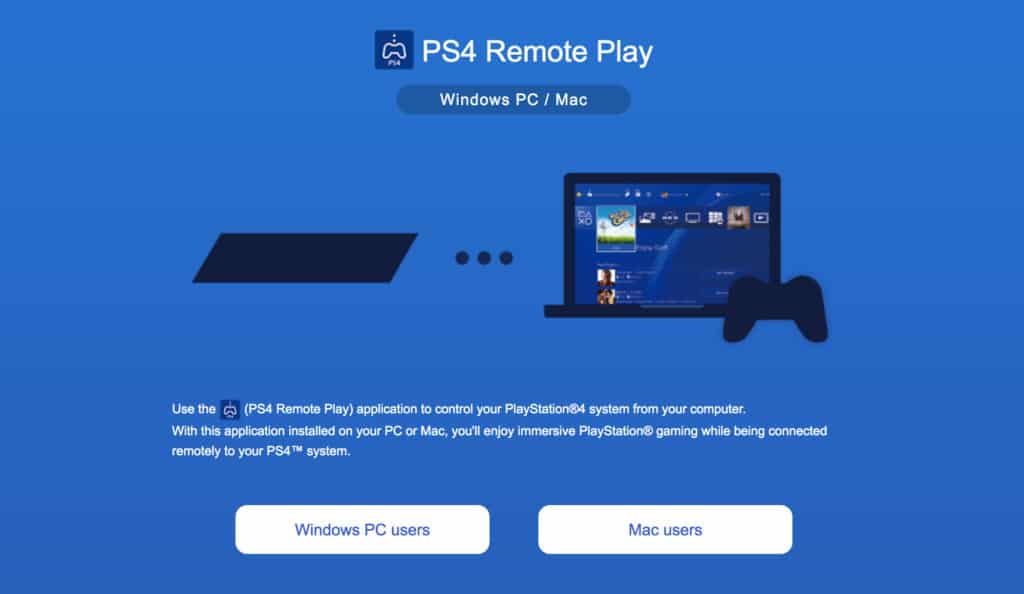
If you already own a device that can run Apex without issue, it may be a smart idea to make use of the supported streaming providers. PlayStation, for example, allows its players to broadcast their games to any Sony Remote Play-enabled device.
All you have to do is install the Remote Play software on your Mac if you own a PlayStation system. You’ll need to do the following steps on your PS4 after you’ve set it up on your Mac.
- Go to the settings menu and choose “Remote Play Connection Settings.” Select the checkbox for “Enable Remote Play” by clicking on it.
- By going to Settings – Account Management – “Activate as Your Primary PS4,” you may make the machine your primary console.
- Connect a controller to your Mac through Bluetooth or USB, then open the “PS4 Remote Play” programme you previously installed. If you’re presented with any warnings, click Start.
- You should be able to start streaming Apex right from your PlayStation if you sign in with your PlayStation Network account.
To use PlayStation Remote Play, your Mac must be running one of the OS versions listed above.
- macOS High Sierra
- macOS Mojave
- macOS Catalina
Because Xbox’s native Console Streaming service does not presently support any Apple devices, Xbox players aren’t as lucky as PlayStation users. For the time being, Xbox’s Streaming service is only available on PC and Android devices, but there are other software options you may attempt to broadcast your Xbox games to Mac.
OneCast is a great example of this, and all you need is a Mac running an OS version higher than El Capitan to use it. Because this isn’t a native Xbox product, you’ll have to buy it if you want to use it on your Mac or another platform.
Make sure you have enough bandwidth before choosing any of the streaming options so you don’t wind up with a poor gaming experience. You may accomplish this by running a speed test on the internet. To double-check your network numbers, conduct a pair of back-to-back tests.
If your internet connection isn’t strong enough to handle cloud or game streaming, it’s time to contact your internet service provider and improve your plan.