If after upgrading to Windows 10, Wifi won’t turn on, use the steps in this guide to fix the problem. 4 Methods are discussed in this article. After each method, check whether your Wifi is fixed before trying the next method.
Contents
Method 1: Modify Your Wireless Adapter’s “Channel Width for 2.4GHz” Property
This method fixes this problem 90% of the time. Follow these steps to apply this fix:
- Right-click Windows 10 start menu. Then click Device Manager.
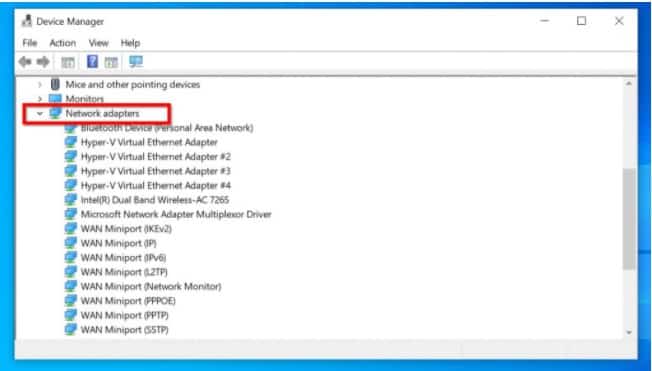
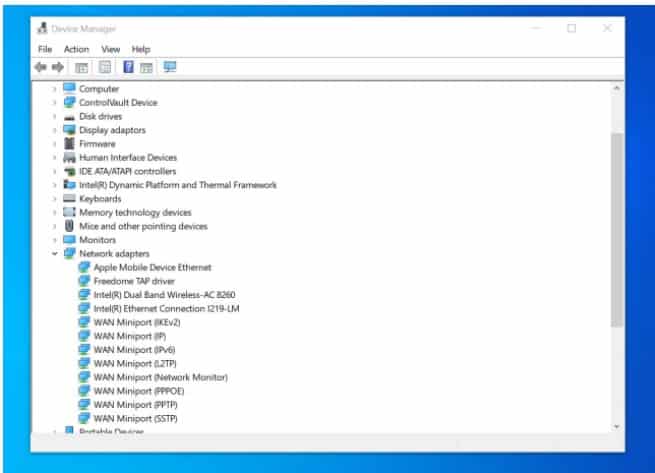
- When Device Manager opens, expand Network Adapters.
- Then locate the adapter that has “Wireless” in its name.
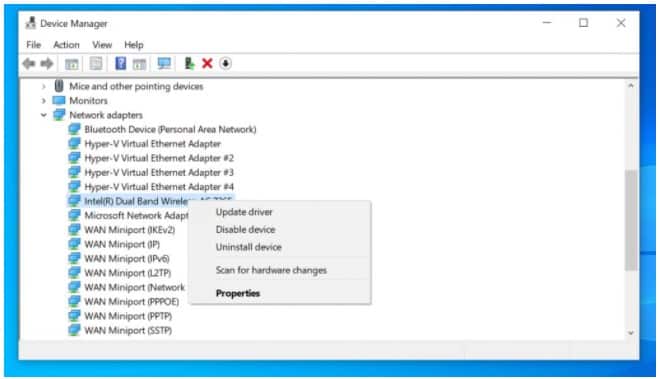
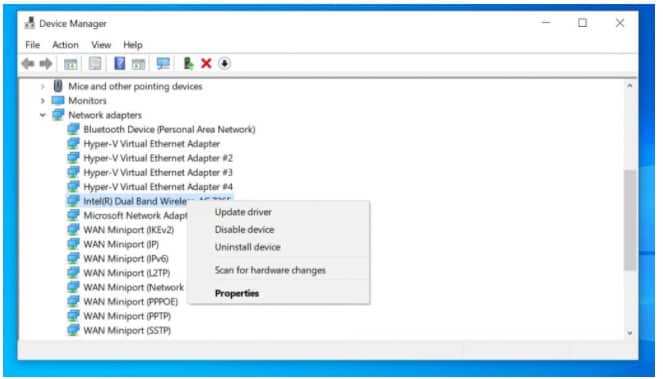
- Right-click the Wireless network adapter and select Properties.
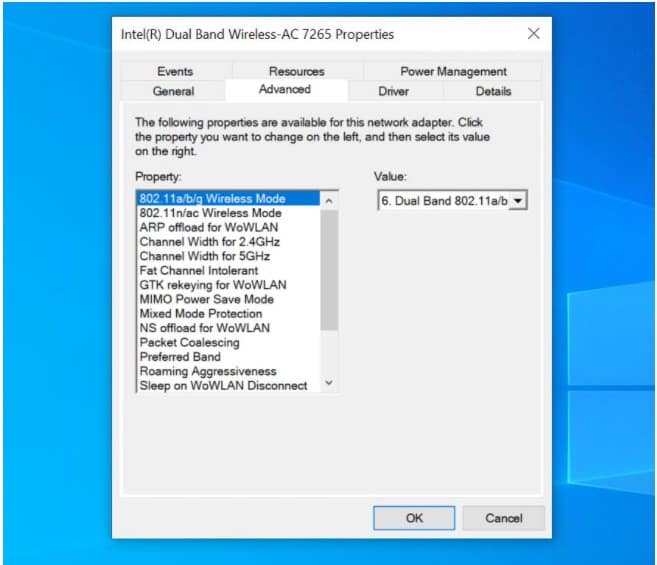
- On the Properties page of the adapter, click the Advanced tab.
- Then, locate “Channel Width for 2.4GHz” and click on it. If the value is set to Auto, change it to 20 MHz Only. See the image below. When you finish, click OK.
Check whether your Windows 10 Wifi can come on now. If the Wifi still can’t come on, try the next fix…
Method 2: Roll Back to Previous OS, Turn off Wifi Device, Upgrade Again
Here are the steps for this fix:
- Unplug your Wifi device from your computer (if it is an external device). For a built-in Wifi device, boot to BIOS and turn it off.
- Rollback to the previous Operating System (Windows 7 or Windows 8.1)
- Repeat the upgrade to Windows 10.
- When the upgrade is completed turn your Wifi via BIOS on or plug it back in.
- Windows 10 should automatically detect the device and install the driver.
After going through these steps, check your Wifi. If your Windows 10 Wifi still won’t turn on, try the next fix.
Method 3: Restore BIOS Settings to System Defaults
Here are the steps for this fix:
- Shut down the PC.
- Unplug the power from the wall outlet. If it is a laptop, remove the battery as well.
- Wait for about 5 minutes.
- Fit your battery (for laptops) back. Then plug your power back on.
- Boot your computer to BIOS.
- On the BIOS, locate a place to reset BIOS settings to system defaults. Save your changes. Then boot to Windows.
- For some systems, F9 will restore your BIOS settings to system defaults. F10 will save the changes.
When your computer boots and you log in, check your Wifi. If your Windows 10 Wifi still won’t turn on, try my last recommended fix…
Method 4: Disable “Allow the computer to turn off this Device to Save Power”
Modifying this setting has resolved the WiFi problem for a number of users as well. Here are the steps:
- Right-click the Start menu and select Device Manager.
- When Device Manager opens, expand Network Adapters.
- Beneath the Network adapter, locate the adapter that has “Wireless” in its name.
- Then, right-click the Wireless network adapter and click Properties.
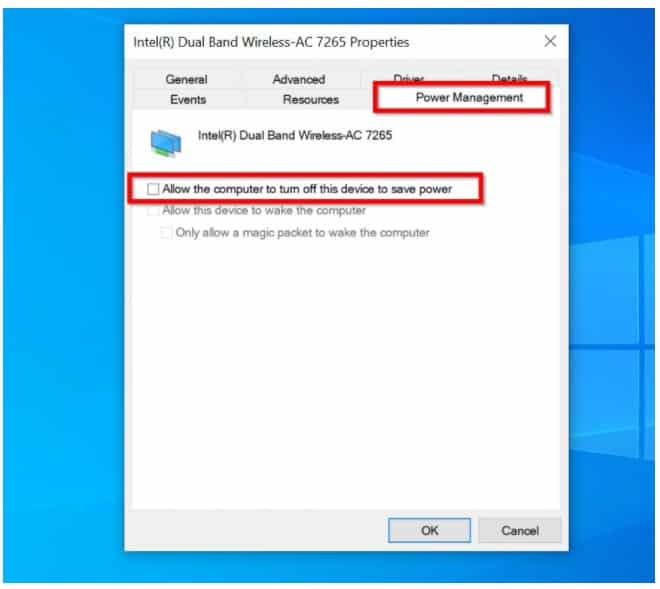
- When the Properties of your Wireless network adapter opens, click the Power Management tab.
- Then uncheck “Allow the computer to turn off this Device to Save Power”. When you finish, click OK.

